Pivot tables are a powerful tool for data analysis in Excel. Large datasets can be easily digested in a fraction of a second to provide you with more relevant and actionable information.
Imagine a data file with every purchase you made last year. How would you calculate how much you spent at at Starbucks? What about the average amount? Without pivot tables, you would filter the data, then copy it into another tab, and then use a sum on it. With a pivot, you could select Starbucks and your total expenses in three clicks.
Step by Step Instructions
- Highlight the cells you want to pivot
- Open the “Insert” tab which is located towards the top of the Excel window
- Click the Pivot Table button
- When the Pivot Table window pops up, click “ok” to create a pivot table in a new tab
Calculated Fields
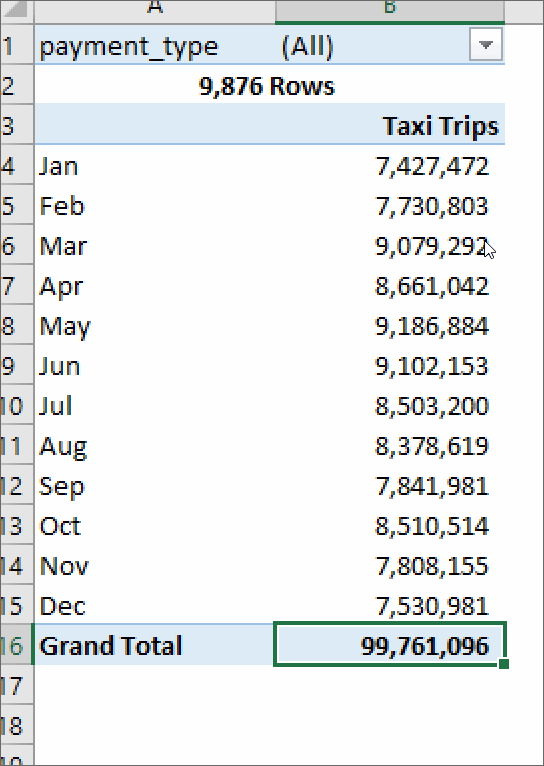
Pivot tables have a secret feature that allows you to create an entire new field in the pivot table which can help create ratios using two columns from your data. In the image below, I’m calculating the average fare of a taxi ride in New York
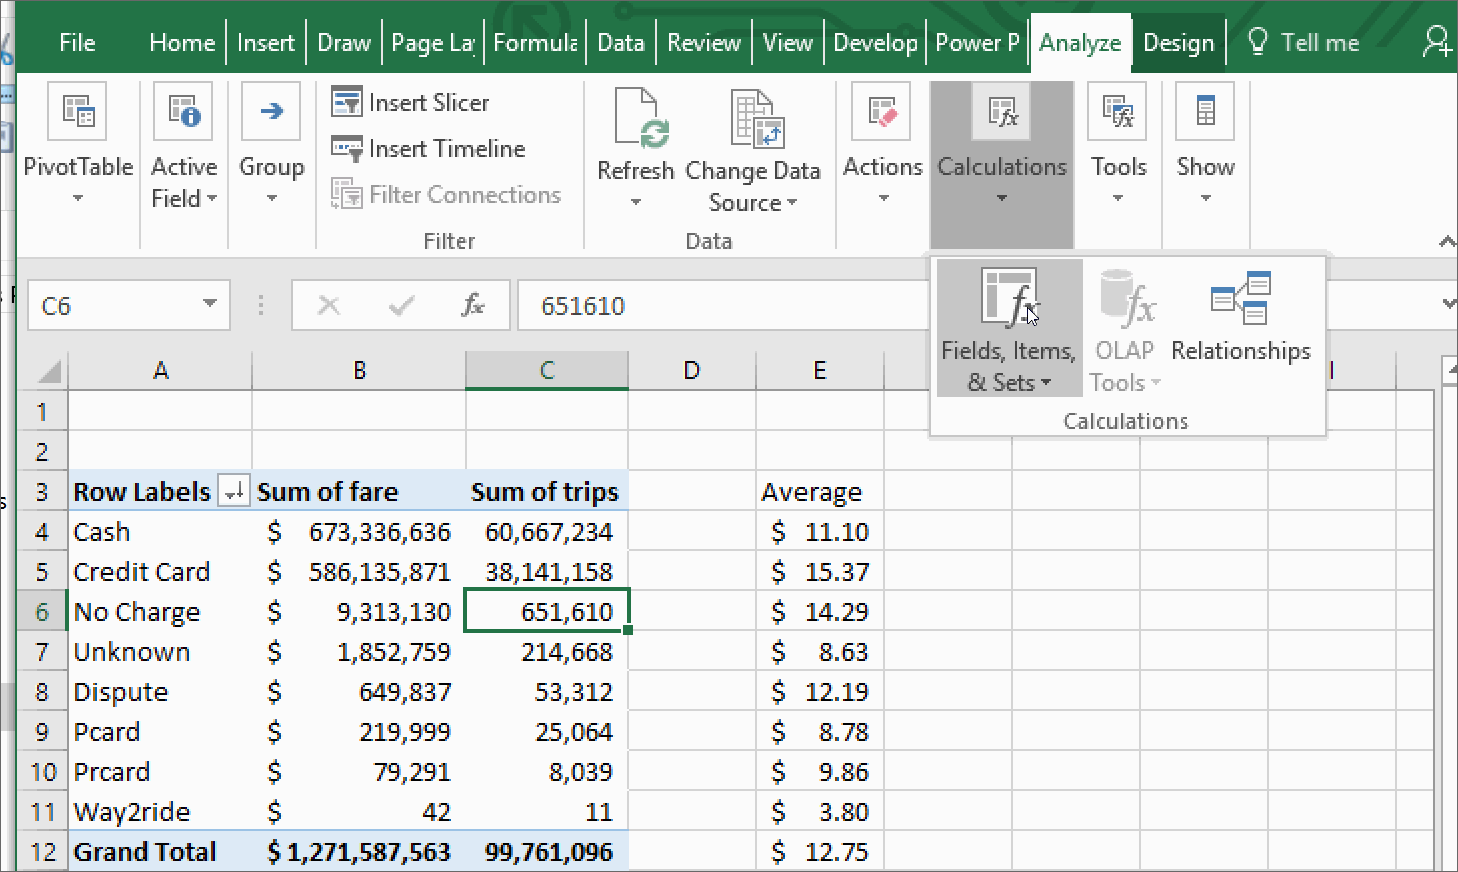
City by dividing the Fare (Sum of Fare) and dividing it by the Trips (Sum of Trips).
examples of a calculated field
Digital Advertising Calculated Fields
Click Through Rate = Clicks/Impressions
eCPM = 1000 * Ad Revenue/Impressions
CPC = Ad Revenue/ Clicks
taxi Calculated Fields
Tip % = Tips/Fare
Average Fare = Fare/Trips